Monday, August 25, 2014

Downtown Diorama Part 04 (making the base)


The base is out of 3/4 inch marine plywood, though it's a bit expensive compared to an ordinary plywood but it's more resistant from water and wouldn't warp or bend easily when moisture seeps in.

And since the surface of the plywood was rather smooth and flat, I made it rougher, otherwise, it would be difficult to glue on the flattened clay, and may peel off when it dried, to avoid that, I stroke crisscross cuts and scratches on the surface just like our neighbor's angry pregnant cat scratching the hood of my car, damn! Back to topic, as an additional protection from moisture I applied layers of lacquer sanding sealers all over it including the sides to completely close the porous surface of the wood, alternatively, painting it with lacquer paint will do good as well. I let it dried in a well ventilated area for a couple of minutes, then applying textures is next.

(Here's the pic, scratched, sanding sealer applied and the glue was spread all over the surface, ready for road texture)


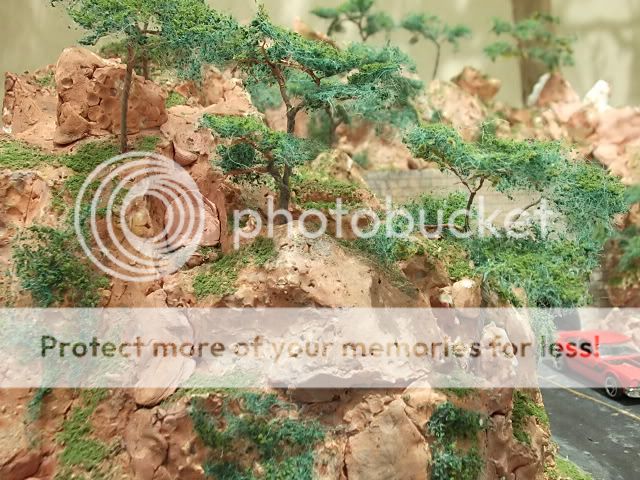
 But before that,  checking some reference images of groundwork on the internet is a sure guide to depict a real convincing textures, as a diorama maker, I have always been observant to our surroundings but a still image of a particular finish is also necessary.

Again, same technique as described on my previous posts about  prepping the clay. Once more, I used air drying clay for the asphalt roads and pavements. Here, I'm going back to the routine preparation of kneading, flattening and laying of clay, as usual, I rolled out and flattened the clay to the desired thickness and glued them flat on the base. While the clay's still wet, I gave it the texture treatment by covering the top with a sheet of sandpaper grit #100, I pressed on the sheet very lightly against the surface with a rubber hammer. While still wet, I also used a scotch brite ( the green side) to add a different texture.


When the surface have been stamped, I let the clay dried up completely in an open space indirect to sunlight  for about an  hour, and then I started stamping it again to imprint finer but sharper textures, since the clay was already hard, I had to do it a little harder, the purpose of the technique was to kill the soft/deep textures as a result of wet clay stamping and i needed the final textures to be a little sharper.

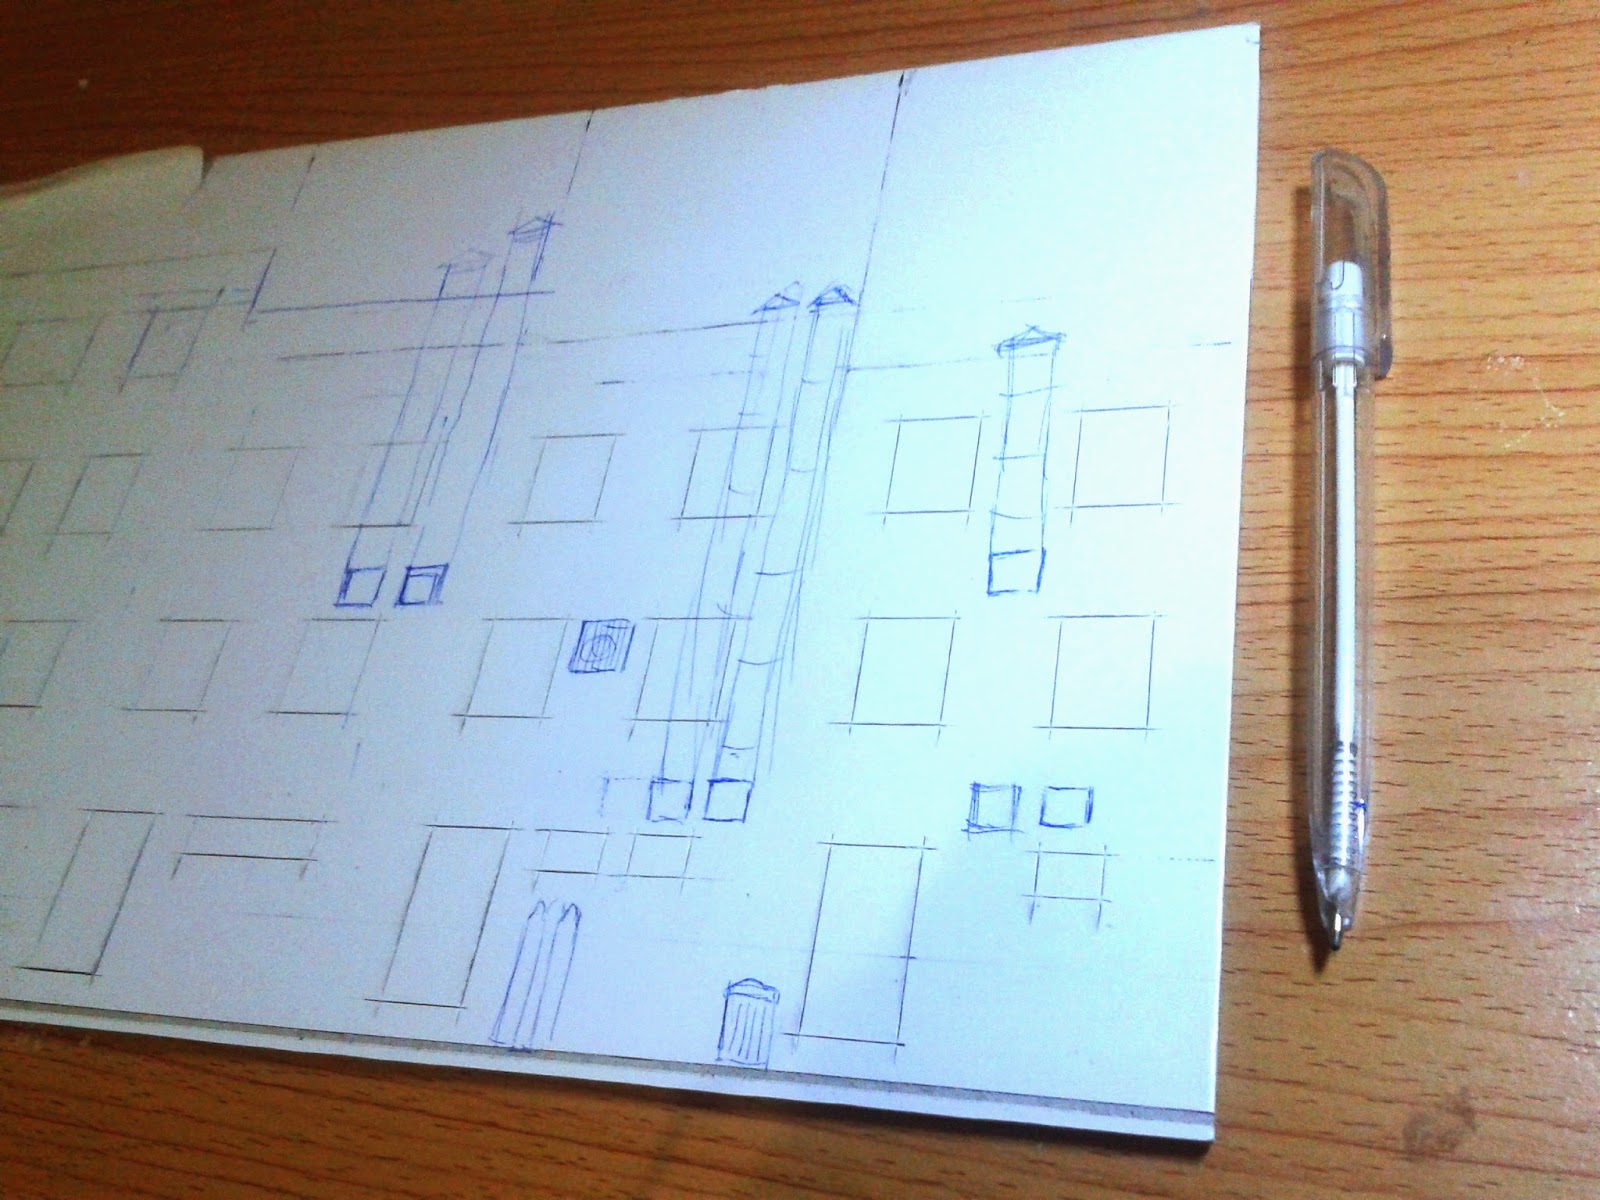
Then, the sidewalk around the building's next. The pavements were made of 1.3mm cardboard that I've measured and cut according to the layout/sketch. I scored the bricks with a dulled hobby knife in order for me not to actually cut the sheet all the way through but only to score the surface to create shallow but well defined grooves. I needed to hide the obvious paper finish of the pavement to look like a real cement bricks or tiles so I had to fake any element that would make the final outcome unreal. The process begins, I softened a small amount of clay in a container with water,  the formula is 10% clay and 90% water (now, I'm a chemist!). I mixed them thoroughly until I got the gooey consistency of a paste. And then I spread it randomly on the pavement with the use of an old wide brush , as we all know about clay, they look naturally matte when dry which is the perfect effect that I'm looking for.

(this is softened clay, though it looks like a little more water is needed)

The already dry softened clay spread-out around the cardboard (pavement)

As a guide, I drew on the surface the tile design of the pavement. 

Below picture,  you may noticed that i did not use the wet clay sculpting technique there as it is going to produce a different effect. It is my intention to have these pavements the look of rugged and cracked tiles because it is obviously more realistic, and I call it the Crouching Tiger Technique.

And that is all the works I have made for the base and the painting will be posted on a separate post some other time.

Saturday, August 23, 2014

Downtown Diorama Part 03 ( making the structure)


Now it is time to move to the building itself. I used 2.5mm cardboard as the main materials for the structure, there are many options to choose from but this comes readily available in my area, though, styrene is still the best for me as it is easier to cut, sand and clean.

First, I drew the location of the windows and doors directly on the cardboard, then the outer shape of the building. Below is the picture, as you can see, I traced the openings and I made deep markings on the surface and was ready for the final cut, I didn't  totally cut out the openings  the first time around as I might change the final design at some point, but in the end, I still chose to stick to the original plan.

To be able to see the correct scale of everything, I drew also the accessories that would come with these project, proper scaling is very important as it is one of the many factors that affects the overall appearance of the diorama when displayed/finished.
'

Just a simple tip when cutting the windows and doors out of the cardboard. The doors and windows should be cut out first, then the shape of the facade later. The reason behind this is that the cardboard is 2.5mm hard material and that's not easy to cut, you would need four sides of the board intact and uncut to hold on to while forcefully cutting out the openings one by one.

Next, I prepared the air-drying clay for kneading, flattening and laying of clay on the facade. Picture below are the materials for this task.

The messy part of the project. It would be really great if I had pasta rollers for kneading and flattening the clay but for now I'm quite alright using my reliable packaging tape. I was aiming for the thinnest flat clay as much as possible but the actual thickness I could do out of it was only about 2mm, still to thick but i have no other choice.

The picture below shows the flattened clay laid on the facade, I used white glue to glue the materials together.  The clay drying time was limiting my job and this is one of the few drawbacks when using this kind of material. So I worked on a patch of clay approx. 10cm x 15cm at a time, then repeats the whole process for the next patch.

We came now to the "not so fun part". This was really the most tedious part of the job, really. If not for the love of the hobby I would definitely skip this part, am I my worst enemy? OK, I made myself an improvised sculpting tool to help speed up the process, it's an old paint brush with its hairs removed, leaving me the metal tip which I trimmed down to .7mm width to match exactly the vertical line of the bricks. I scored the horizontal lines using the tool with the guide of a straight edge and then, the vertical lines were sculpted "mano mano" as shown in the photos.


I have to stress again the challenges when working with air drying clay, I have to to do sculpting in super fast mode while keeping the distance between each line consistent before it becomes completely hard, but few mistakes were still fine, anyway, the whole facade doesn't have to look perfectly sculpted as I needed variations on some parts of the surface for more realistic effect.
i

Gluing the walls together. I used superglue for assembling the building walls, I applied superglue on the end joints of the parts and held them together and waited for a few seconds or a minute to make sure the glue is fully cured. CA glue or superglue are somewhat brittle and it seems the glued parts goes off easily whenever I am working around the building like when I'm painting for instance. To reinforce the joined walls, I applied a few layers of thick white glue on corners then wiped the excess. That's all for now. Till next time!

Sunday, February 10, 2013

Downtown Diorama Part 02 (materials and tools)


Materials & Tools


I listed below the basic materials and tools for this project as well as the corresponding applications of each items for better understanding. These materials and tools pertain also to all my previous projects just in case you are wondering how I made those. This post may bored you but keep on reading, there are tips & tricks you might want to know.

Materials and application:
   
1.Very sturdy cardboard 2mm. thick, more than 2 mm thickness for this scale 1:64 will be way out of proportion as this one is already out a bit

·         Used basically as a backing material for all the building structure like walls, floors, sidewalk, other hardscapes.

·         Advantage - works well with air drying clay than styrene sheets and does not bend due to shrinkage of the clay when it dried. Air drying clay firmly adheres with cardboard and easy to cut.

·         Disadvantage – cannot be sanded or polished, becomes spongy and soft if absorbed a lot of water, jagged edges may appear if not cut accurately.
2. PVA Glue (white Glue)
·          For bonding large components

·          Hardens and reinforces the dried clay when mixed together with small amount of water.

·         Adhesive for landscape materials like grinded foam and earth soil.

·         Good enough for bonding porous surfaces.

·         Not very good for bonding small, thin and smooth parts.

3.CA glue (super glue)      

·          For bonding small parts and accessories

·         quick bonding for small, thin and tricky parts

·         Disadvantage – a few seconds of working time, Fumes is hazardous to health, very high chance to be mistaken for an eye drop, bonds your thumb and index finger instantly without noticing it :D

·         dangerous and should be kept away from reach of children at all times

·         I really refrain from using this as much as possible

4.   Styrene plastic sheets 1mm thick

·         Used for detailing of accessories like window frames and sills, door frames, doors, AC mounting brackets, facade frames and moldings and other small stuffs

·         Very good material for building flat facade like walls/ floors/ sidewalk / other hardscapes

·         Advantage – has smooth surface and easy to cut, sanded and curved

·         Disadvantage – Paint does not stick on very well but with a few coats it will be ok.

·          Small and thin parts become brittle overtime.

5.Air dry clay

·         Mostly for texturing different surfaces.

·         Good material for simulating bricks, rocks, cement walls, asphalts, pavements, tarmacs, different kinds of wall finish and so on.

·         This is only good to apply for small areas as it dries quickly and have to work with it by patching and finishing one area after another, usually 10x10 cm of surface for each patch I think, before it completely dried and unworkable.

·         it is only appropriate for replicating old, uneven, irregular and weathered surfaces and if you are making a flat/plains surface, you must go with styrene sheet instead.

6.       Set of Acrylic paints in tubes or hobby paints

·         Easy to clean and safe to use even inside the room, has a matte finish which brings painted material looked more natural.

·         Obviously not good for shiny objects.

7.        electrical wires

·         I use this for trees armature

·         Cables wires

·         Small pipes

8.       empty bottles of different size

·         Mixing containers for paints and other liquid.

9.       Toothpick or cocktail holder

·         I use this whenever I need round material for columns, balusters, posts and others

·         After every meal  :D

Tools of The Trade

1.       Cutter or Hobby Knife

·         For cutting stuffs I guess?

·         The rectangular shape of the cutter is easy to hold and this is why I prefer this over hobby knife or exacto knife.

2.       Straight edge or ruler

·         preferably made of steel – used as a guide for cutting the parts

·         In my experience as a modeler, I already had countless hand injuries in this hobby, one of the things I avoid using arevthe plastic rulers and you should too, it is dangerous, plastic are very soft and the cutter jumps and cross easily on the edge and slices the finger.

·         Be careful with this tool

3.       Improvised sculpting tool

·         an old paint brush converted into sculpting tool, I removed the brush hair and file the tip to the desired size and shape.

4.       Packing tape or any cylindrical object

·         Round profile to flatten the clay

5. Marking pen 

6. Cutting mat

7. Paint brush

8. Sand paper

Well I guess, that pretty much covered all the use of the tools of the trade and im just gonna update this post from time to time whenever I find new tools and material along the way which were never mentioned above.

Honestly, I am getting bored of this cheap materials that ive been using for many years that is why im planning to move up a little and wanted to try store-bought-materials, I will see if those can really help improve the quality of my diorama.

I will start posting pictures of the actual WIP of the structures on my next post! See you all there!

Sunday, January 6, 2013

Downtown Diorama Part 01 (introduction / concept),


Introduction & Concept

Hello! Here I am again with all my madness about dioramas, I have a new project that I’ve been working on and off in the past few months, the scale is 1:64 as usual. I will be sharing the “making “of this project and  I hope you can pick up something useful out of it or find it interesting, get some idea or maybe just looking up and planning something similar in the future.

The concept, the original concept was a dirty back alley scene, between two brick façade buildings (cutaway buildings) just like our favorite car chase scene in the movies. At first, I thought the scene was pretty good for my diecast photography, muscle cars in particular but I realized that it was lacking on something, too small, very few interesting viewpoints, I think it was not all that bad but there is more room for enhancement. And that made me think that I have to go over again and balance the composition by incorporating aesthetically pleasing view like planters, flowering plants and some bushes to tone down the rough setting of the diorama, so then I decided to extend the base to the front and completed the whole concept by making the other cutaway building as full structure with local shops in it and will be located in the middle of the base, I added also a main street and two inner streets that connects the back alley.

I started out with a sketch of the layout, you can see from the image the location of the buildings, the building in the middle of the base (originally cutaway) and the background building (cutaway) and the inner street going down the back alley connecting it to the main street. I also indicated in the drawing the positions of the cameras as I wanted to identify how many interesting viewpoints I can capture with this arrangements. The background building is cut away and the floor levels will differ from 2 to 3 storey’s high serving as the backdrop of the diorama, intentionally a bit higher than the building at the middle. Let me give you a brief detail about the background building, the first shop starting from the left is a car garage shop but not yet the final. the next one is the back of a restaurant, I will have there the exit door, kitchen exhaust duct vertically going to the roof, garbage bins, gas tanks, electrical conduits, AC units and many more, I certainly know the equivalent work that comes with it but those details are necessary component for authenticity and character of the scene which is, by the way, the main idea as initially planned on this part of the diorama. The third one is the competitor; I imagined the back alley will be a lot busier with mechanical elements and rubbish stuffs if I add another restaurant. The far right is an abandoned and dilapidated building, I run out of any good idea for this one and I still have to wonder about it. 

The building in the middle was divided into commercial spaces, the first shop from the left is a coffee shop and books store, I thought an outside sitting area at the front of house would also be a great additional point of interest but the space is not sufficient to put up the umbrellas and tables, it needs at least 3 tables but I will find a way to fit in this idea in any way. And at the back, I will have a small exhaust for the coffee shop kitchen or maybe it will be mounted on the roof. The facade, the lower part of the front facade will have a typical design as most coffee shops have. The second shop was originally planned as fashion boutique but on the second thought, an outdoor apparel or liquor store will give the diorama the atmosphere of a local scene. the third is a laundry shop, the front facade will be simple, I need more mechanical elements at the back alley and this is why I chose to put up a laundry shop, shops like this requires high electrical loads so it needs to have transformers, conduits and exhaust for dryers, big electrical cables and leaking pipes with moss which will make the back alley really messed up and a little shadowy which will make the scene very interesting if executed properly. By the way, all the descriptions of the shops and details as mentioned above may change a little bit when the actual construction takes place.

I also drew some perspectives and the picture here was the chosen piece among the couple of sketches (my drawing skills are deteriorating over the years, pls. bear with me) this is for visualization purpose only and not to be assumed as final, this is some sort of inspiration for me to keep on going each time I see this posted on my wall, it’s pretty effective. I spent a couple of nights developing the idea, gathering information and with the help of some reference pictures from the net and through my archive, I slowly making my way up, I also checked out some cuts from my favorite movies ….but ending up watching the whole movie!!! Anyway, with all these references and a mixed of wild imagination, I manage to get together the requirements for this project. 

The overall extent of the base is yet to be finalized as I still have a few things to reconsider, mainly at the front like adding a wider parking area, but while I’m trying to figure that out, I started the construction of the building instead.

Thursday, April 12, 2012

The Tunnel Diorama

Here is another diorama that I'm working on for some weeks weeks now, actually, it's a snap project and nearly finished at this time, just a few accessories that i need to put-in to complete the whole scene, If, I can think of any, otherwise, that's it. I am terribly sorry that i did not exert an extra effort to share the WIP's for you, I was in a hurry to finish off the scene as quickly as i can and take pictures of the models from last year acquisitions, they have been kept in the cabinet for some months but now they're discarded and free, I'm just too excited to finally post them here in my other blog. Oh, before this one, I 've started a back alley diorama but this tunnel diorama idea just popped up in my head, setting aside the first one and started this instead.Everything just flowed down on me and here is what i got so far.

I would be glad to see you visiting my other site http://diecast-habitat.blogspot.com/ Thanks!

Monday, May 30, 2011

The Old Brick House

Yes, I know it’s taking me ages to finally post some entry/images for this project. Anyways, here is what I got to share so far. I lost count of the hours spent on it as I only have limited time every night to work with it and one more hold back is this addictive internet surfing, although I must admit that it’s really enjoyable for most times and it’s not all that bad I think, in fact, it helps me personally when I’m having a long bad day in the office.

Back to the diorama.

Here’s a brief background of the concept. The climate is subtropical, a small village somewhere in Italy, a few hundreds of feet above the sea level and sitting on the mountains facing the vast blue Mediterranean Sea. Perhaps, this house is about, let’s say, more or less hundred years old, maybe? Would you agree? This is not military modelling anyways, so we have a little bit of freedom here:) with regards to historical accuracy and facts, of course. The current season is spring with an average temperature of 27-32 degrees, cool wind in the afternoons and dry-cool wind in the mornings, I guess. These are some of the factors that will affect my way of weathering the whole diorama, I mean the type of weathering effect this diorama will receive bearing in mind the geographical location, age, materials and climate.
My list of diorama projects and ideas is long but I prioritized this one because I’d like to enhance my basic knowledge in sculpting.  These would also be a great opportunity in using modelling clay (air drying) and to explore new techniques and approach in modelling, weathering and sculpting surfaces like bricked wall, cobblestones, limestone, concrete plaster, and cracks on wall, heavy texturing.... and so on, something that is a little over the top as some might say but that’s exactly the whole point of this. I also had the chance to mix and experiment different types of colors, hues, shades....to imitate real life elements. And I’m having a good experience with this build.

All the details you see in this picture are built from scratch, I painstakingly sculpted a 40x50 cm. base and in which the sculpted areas like streets, landscape and building walls are 85 percent of the total area, enjoying the first few weeks but as I draw nearer to completion it’s becoming a burden ...and I asked myself, what the hell am I doing? But then again, watching these images and staring at the  diorama itself makes the hard day’s night worthwhile, really worth it. This is my first time sculpting almost an entire diorama, I started building the core of the house with the use of cardboard and then plastered it with air drying clay, while the clay is still soft and wet, that’s the time I’d start sculpting the surface real quick  other wise you'll be carving the surface cause it's already rock hard lol! I guess I need to make a separate post dedicated to tips, tutorials and techniques I use, i'll do that in the future.

 I fabricated some diorama accessories to add realism to the scene. I made some vegetable crates, pallets, wooden boxes, stand, chair and some bags, also added are the fruits and vegetables in different kinds. From this picture I can see some cucumbers, potatoes, apples....and I guess some avocados too.
All the wooden accessories are made of cardboard which i cut to size ( 1mm strips) and stick them together with glue, pretty straight forward, though it really eats up a lot of my time in the assembling process, literally it's ''hard to handle''. I used small seeds I found in the kitchen to make the fruits and tissue paper soaked in paint for the leafy vegetables.


Featured car model here is a 2006 Pontiac Solstice.

Nice castings but ugly rims. Just wondering why this company could not make a more realistic wheels, it's not that difficult Maisto guys! I could even make one mold master for you to use...free of charge! LOL!


 I love this chair, looks simple and cute. Almost took 1 hour to build and paint this thing.

Some more shots to enjoy.


Sunday, December 26, 2010

The old brick house (intro)

This will be the start of my build log for a new diorama project, but first let me apologize in advance to everyone as I may not be able to share the initial WIP photos because my camera broke down a few months ago, and I'm still in search for a better camera that could give me a fairly satisfying macro shots. I do hope I could decide earlier this coming month and grab one as soon as possible, really excited to take my first shot ...oh, got carried away, I forgot the consent of my wife about this!